Fav Photo Friday #4

Well it’s that time of the week again and this time I thought I’d do a little trip back to winter last year. It was this time last year that we first purchased the awesome little piece of land that I keep going on about, with my parents and to celebrate we thought we’d host a good ole’ country bonfire!

Now no bonfire is complete without a spit roast so of course we threw one of those on for good measure, but we also decided to not just have a standard bonfire ie. lighting up a pile of wood we’d collected. Instead we wanted to burn one of the many dead fallen trees on the property, in fact we have so many that I think we’ll be having many bonfires for years to come.

The reason I was thinking of this fabulous bonfire recently is because Mr D (my hubby) will be 30 years old in less than 3 weeks and we are hosting a good ole’ country shindig for him and naturally (now that the fire ban has been lifted) we wanted to have another big bonfire! It’s definitely something I’ve been looking forward to for a while now, in fact I really should get back into planning mode and finesse some of the last minute details, you know, like birthday cake!

So just for fun I thought I would share a few snaps from last year’s bonfire. With all this cold rainy weather about it really is making me wish it was time already.

201509 Julimar Bonfire 027

Only just getting started….

201509 Julimar Bonfire 041

Well on it’s way now….

201509 Julimar Bonfire 053

Beautiful! Well and truly blazing now!

There really is nothing like staring into a fire while it burns, especially when it happens to be a massive bonfire. Stay tuned, in a months time I’ll have some photos from Mr D’s birthday party to share and hopefully there’ll be some spectacular fire photos in there too.

Till next week folks! Have a fabulous weekend!

xx


Not Another Anzac Biscuit Recipe

“They shall grow not old, as we that are left grow old;
Age shall not weary them, nor the years condemn.
At the going down of the sun and in the morning
We will remember them.”

It was ANZAC Day here in Australia yesterday and for those non-Aussie’s among us that means recognition for the day the Australian & New Zealand Army Corp (ANZAC) troops landed in Gallipoli in 1915. A bloody day that we now use as a way of recognizing all troops, fallen and standing, no matter their fight.

Anzac Day though normally means 4 things to most Australians. A Dawn Service and march. The reading of ‘The Ode’ (the above poem), wearing a poppy and Anzac biscuits. Now ever since I went gluten free I have had trouble making Anzac biscuits, they’re a buttery biscuit you see and typically spread quite a bit and I found I just couldn’t get them right! (and yes I know Oats are in fact NOT Gluten free, however I find I do not react to them if I don’t eat a lot so please keep that in mind if making these for a coeliac.)

So for the past several years I have been on the hunt for the perfect Anzac bikkie that could be used with gluten free flour and honestly I’d almost given up hope. I have tried 100’s of recipes, even going back to the history of the Anzac biscuit and starting from there! That was until I received Nigella Lawson’s new ‘Simple Nigella’ cookbook for Christmas last year. Hallelujah! Nigella has done it again. I knew the minute I pulled the very first batch of these out of the oven that these were going to become my go-to Anzac’s!

So with that in mind I decided to bake up a big batch of these fabulous Anzac biscuits, especially since this year we won’t be attending any dawn services. Actually I will admit I haven’t attended a service in many years, it is something though that I intend to do with my son once he’s a bit older. Actually speaking of my son, that reminds me of last year when I sat up in the wee hours of the morning and watched all of the Anzac Ceremonies, in particular the one in Gallipoli itself noting the 100th Anniversary.

I will say it was quite an experience, watching tribute after tribute (each channel televised their own) especially as I happened to be awake at 4am to feed a very hungry, very new baby boy. It was probably the most emotional Anzac day I’ve ever had. Of course I was always humbled in the past by the sacrifice our countrymen made for us, but I don’t think it really hit home until I had a son of my own. And as I sat there watching the bugle blow I imagined what it would be like to not only send my own son off to war but to have him not return. It’s definitely made the whole day just a touch more meaningful to me now.

So on that note I decided I wanted to share with you my experience of Nigella’s Anzac biscuits, which I swear are the best I’ve ever eaten!

DSC_0055 (1)

Nigella’s Seed-studded Anzac Biscuits

Makes: 16 or so biscuits
Prep Time: 15 minutes
Cook Time: 8-10 minutes

Ingredients:
100g Unsalted Butter, softened
100g Brown Sugar
30ml Golden Syrup (I had none, so used Honey!)
1/2 tsp Bicarb Soda
30ml Boiling/Hot Water
125g Plain Flour (I used Gluten free flour)
50g Desiccated Coconut
100g Oats (Not instant oats!)
25g Pumpkin Seeds
25g Sunflower Seeds
25g Sesame Seeds

Method:
Pre-heat your oven to 180º Celsius and prepare 2 baking trays with a sheet of baking paper each and set aside.

In a large saucepan, which will need to be big enough to fit all of the ingredients in, pop your butter, brown sugar and golden syrup (I used honey as I had no golden syrup in the house!) and pop over a medium heat. Let the butter melt into the sugar and syrup and stir slowly to incorporate. Ensure the brown sugar dissolves fully into the buttery mixture and you’ll find it turns a deep golden brown colour, now remove from the heat and set aside for a moment.

DSC_0029 (1)

While that cools slightly grab a small bowl and mix your bicarb soda and hot water together until dissolved. Now add it into your syrup mix but be sure not to stir too vigorously! The bicarb will react slightly and bubble up!

Set that aside for a moment and in a plastic bowl weigh out all of your other ingredients, they can be measured into the same bowl as they’re all just going to get added together in a moment. Now I decided to try out the All Purpose Gluten Free Flour blend that I mixed up for Mister L’s birthday cake in place of the plain flour and I have to say it worked a treat!

Now that everything is all weighed out you can go ahead and pop all of the remaining ingredients into the saucepan and work together. You’ll end up with a seedy, sticky mixture.

You can now slightly mold the mixture into tablespoon sized balls and place an inch or so apart on your prepared trays. Pressing down slightly with your fingers will result in a fairly rounded thick biscuit, so if you prefer a thinner crunchier bikkie try flattening a little more.

DSC_0034 (1)

Hubby and I prefer a chewier style Anzac so I opted for slightly rounder, thicker ball.

These can now go straight into your hot oven for 8-10 minutes. An Anzac biscuit’s chewiness is really one of those personal things! So adapt your cooking time to your tastes and be sure to check on them at the half way point, I recommend turning your trays also to ensure a nice even golden colour.

Personally I checked my biscuits at 8 minutes and decided they needed a tiny touch more, so they ended up cooking for 9 minutes and after cooling for 5 minutes on their tray they ended up the perfect mix of crunchy and chewy! Just how my hubby and I like them!

So if you, like me, have been on the hunt for an Anzac bikkie that perfectly cooks every time, that’s a little bit different to the usual recipe and is the perfect mix of chewy and crunchy, then I urge you to give these a try! They are seriously the best recipe I’ve tasted and damn easy to whip up too.

Now the only question is…. how long will they last in my house for?

DSC_0047 (1)

DSC_0054 (1)

I also had a little helper while I was taking these shots! 😉

What do you think? Will you be giving these delectable bikkies are try? It’s never too late to mix up a batch! Don’t forget to like, share & comment below!

**Please note this recipe is not my own and the original copy can be found in the cookbook Simply Nigella which can be purchased here. This is only my experience and review of Nigella’s recipe. **

Fav Photo Friday #3

OK So I promised no more baby spam and I tried, I really did. And hey, surprise, surprise! I actually succeeded, this time. Can’t guarantee it won’t happen again though…. especially at the rate my Mister is turning into a big toddlin’ boy.

But this week I wanted to share with you one of the awesome things about living in the country. It’s the ability to just pop out and have a BBQ in a remote spot on your own property and just relax. Yeah, I know city people would argue the fact that they can hop down the beach or to a park, but you know what? You have to share those…. with sometimes millions of other people, especially since it’s still school holidays here. What I’m talking about is solitude. About reconnecting with nature and just breathing.

I’m talking about Wide. Open. Spaces. (Cue the Dixie Chicks… no wait, dont!)

It’s probably the number one thing I missed while living in the city. There you are constantly surrounded by people, by noise, by movement or commotion. Even on a quiet beach at sunset there’s almost always something happening.

Here you have space.

When we used to visit my Mum and Dad on the weekends (while we were still living in Perth) I would relax on the drive up but only a little. It wouldn’t be until I was standing on their big verandah overlooking their property that I would fully ‘exhale’. That’s what it always felt like to me. A really big, really long exhale and I would finally feel myself relax and move into ‘country mode’.

This is what I wanted to share with you today. So that maybe you might pop over for a visit, not necessarily to here, The Wheatbelt, but to the biggest, widest, open space near you and to encourage you to take a second to appreciate feeling alive.

DSC_0091

The view from our BBQ spot, looking over the back half of our property.


DSC_0087

Even the dogs took a moment.

DSC_0011

So I hope this has inspired you to get out into some wide open spaces this weekend. Hey why not come for a drive up this way? It is starting to look pretty darn nice out here at the moment and you never know, you might even have an ‘exhale’ moment of your own. Oh and don’t forget to pop by next week for more peeks into my backyard.

Share the love with a like, comment or share below!

9 Steps for Throwing a First Birthday Party

First birthday parties are like baby showers. People are shocked if you don’t have one but you’re given hell if you go all out. Somehow amongst all the ‘parenting’ and raising a small human being you have to find a happy middle ground in the party department. 

So if you’ve been following me for a while now you’ll know how much I was looking forward to planning Mister L’s First Birthday! I know a lot of people these days don’t put a lot of stall in first birthday parties, I mean what does the baby know anyway, but I felt like it was the beginning of only a handful of years where my baby boy would let me throw him a cute party with all the trimmings. Plus I’ve heard the story so many times I’ve lost count, of how my friends’ children grew up and no longer wanted to do stuff with mum and dad anymore because it’s not cool. Well be damned if I was going to miss an opportunity to throw him a cute party before he outgrows it!

The topic of what to do for L’s birthday was something I started thinking about and discussing all the way back in December…. you know when he was only 8 months old. But even then I felt the sting of competition and the stupid need to throw some crazy extravaganza. Now I’m not a complete cuckoo, I know he doesn’t really know what’s going on or even need that many damn toys, but there was a primal need in me to show him some kind of recognition for the day. So I naturally started haunting Pinterest every chance I got and I now have a collection of themes for every birthday until he’s 10! But actually deciding about what to do or more importantly what not to do for his First was driving me bonkers.

I eventually used a process to narrow my thoughts down and actually got to the planning stage but it did take a while, and let’s not talk about how many times I changed my mind. So I thought it might be a grand idea to share with you my process, just in case you need a helping hand here too.

DSC_0066

9 Steps for Planning a First Birthday Party

Step 1:
Ignore the hype and the need to compete with everyone else’s child’s birthday party. Yes I mean ignore the beautifully styled extravaganza’s on Instagram! Yeah I know how hard this step is to actually do. But try.

Step 2: Activity
Decide on what you actually WANT to do and what you can AFFORD to do. After tossing around every idea on the planet I eventually cut the festivities into a list and started eliminating them with the practical senses of my Banker Manager husband. Here’s what my list looked like:

– A trip to the Zoo or AQWA with family and some friends – Scratch! Kid is too young to appreciate either of those things. Save it for when he’s older. 
– A BBQ at the Park Again he’s a bit young to fully appreciate the park and I’d have to spend the whole time on the play equipment with him. Again save it for when he’s older and I can just supervise from the side. 
– A BBQ at Home After writing and re-writing the guest list a thousand times I decided this was going to be a costly affair no matter how I organized it. So scratch!
– Full on Kids Party at Home complete with Dinosaur or Superhero theme Nope. No need for that either. He’s 1. He barely understands that another child is a human being let along how to play with them. Save this for when he’s older too.
– Afternoon Tea at Home in the backyardDing! Ding! Ding! This is what I ended up deciding to go with for a few reasons. Firstly it wasn’t going to cost the world as I was only putting on afternoon tea, not a full lunch. I could invite a handful of kids to play and they could run around the backyard with the dog (didn’t end up happening of course) and if Mister L chose to join in he could. It also gave me space for people without wondering about how many people would fit in my house and lastly it could be cut down to only an hour or two so Mister L didn’t end up too over stimulated. 


Step 3: Guest List
Now that I knew what I was doing I could write and tailor the guest list accordingly. I found this to be a far easier way to proceed rather than the other way round, deciding on people first then the activity. But if that works for you, then go ahead and switch them around. My problem was drawing a line as to which friends to invite, but once I started looking at it as a chance to catch up with a few friends and have some fun with my boy (let them see how big he’s gotten too) I found it easier to pick. I’ll save the ‘everyone from playgroup or kindy’ invited parties for when he’s older. If he doesn’t mind who’s there than I can enjoy myself instead!

Step 4: Pick a time (and date)
Something that plagued me for a little while I will admit was deciding on what time of the day to have it. Anyone with a bub around this age will be with me here. The following scenarios ran through my mind;
“Will it be a good nap day and he’ll go down beautifully and wake up happy?” or
“Will the crazy bugger decide to drop his morning nap and turn into a psychopathic monster?”
“Will he be happier in the morning or afternoon?” or should I not worry at all?

Trust me on this. You above anyone else know your baby and his/her mood swings. L for example is happiest first thing in the morning between 5am and 9am. But alas no one is going to come to a party then… well except maybe Daddy. The next best time of day for him varies to how well he naps or whether he fights me on them…. which of course he decided to attempt to drop his morning nap the week leading up to his birthday! In the end I decided to plan it for straight after his second nap and just pray that he would go down well.

Luckily it all turned out OK in the end. Mister L did fight me on both his naps that day but eventually gave in and still napped well. We had a few tears when he first woke up and people had started to arrive but he settled in after a few games with daddy and he had a chance to acclimatize to his surroundings. After that he was a happy go lucky boy laughing and playing with everyone and enjoying his cake. Just remember to plan your day around your bub and be prepared to kick people out after a couple of hours if they’re getting too overstimulated.

Step 5: Pick a Theme
So this ended up being the hardest part! I mean have you seen what comes up when you type ‘First Birthday Party’ into Pinterest? But again I decided I wanted to save some of the really cool themes for when he’s older…. I swear though if he doesn’t want a dinosaur theme with homemade, tie on dinosaur tails when he’s older I may just plan it for myself!

In the end I went pretty simple. Rainbow colours! inspired by the awesome cake I had selected months ago (which you can find the recipe here). It was easy to decorate for, I could get all the bits and pieces I needed in some nice coordinating colours and it was cute and not based around a TV character (I wanted to avoid those till Mister L is at least old enough to tell me his favourites!). The great thing about themes these days is there are soooooooo many to choose from. Just do a quick google search or Pinterest search, or why not visit some of my favourite party shop websites for inspiration? Check out One Magic Day or Ruby Rabbit, both Australian owned party supplies stores with heaps of inspirational ideas and plenty of goods.

DSC_0075

A bright, rainbow themed party was in order with Bunting, #1 Balloon & some tableware from One Magic Day. 

Step 6: Shop Small, Buy Local
I’m a big believer in supporting small and local businesses, it probably has a lot to do with my parents owning a couple of small retail stores when I was a teenager. However in the last few years I’ve become an even bigger believer in supporting small stores where ever and whenever I can.

A complaint I hear often is that small businesses (especially those based online only) take a while to make/deliver things. My answer to that? Be prepared. Do your research early and plan ahead, small businesses don’t always have the buying power the big box retailers have and some even make the goods themselves, this all takes time.So where ever I can I buy local (to support the families in my own town) and shop small (like these awesome Aussie women with their party stores above). So get prepared and start shopping! Instagram is a great base for Aussie Mamma made items if you’re wondering where to look.

Step 7: Decide on what food/drink
This step all comes down to the accumulation of the above info. Will there be kids at your party? Then you may need to think small sandwiches and fruit platters. Will there be a full meal or just afternoon tea? The key is to think practically and outsource whatever you can. Having a bbq at the park? Ask everyone to bring a platter. Don’t laden yourself down with huge amounts of cooking or else you’ll miss all the fun!

DSC_0101

A backyard, afternoon tea style party was just the ticket. With mainly adults in attendance we could offer a slightly more decadent food and drink selection with cheese platters, homemade dips and champagne. 

Step 8: To Present or not to Present
It’s pretty common these days to see ‘No presents please’ on an invite and I can understand why. Most children have enough toys and clothes that another 20 items is just going to make your house burst! Have a think though as to whether or not you want gifts at your party. I didn’t bother with the no presents please spiel but did ask people not to go overboard. I have to say we got some great gifts and Mister L is thoroughly enjoying them (as I type he is sitting in his pop-up castle reading a book with his pet Stegosaurus) but we also got some really thoughtful gifts too, including a voucher for Caversham Wildlife Park to take Mister L to a little later. It really is a personal decision whichever way you go. Just be prepared for people to ignore your requests too!

Step 9: Goodie Bags
The last thing to consider is Loot Bags or Goodie bags. Since our party was pretty low key in the kids department I bought a few simple toys from a dollar store and a few choccies and popped them into little bags that I set aside. That way I was prepared whether the kids who were invited came or not. The thing to remember is age. Always choose age appropriate items for the bags and always hand the goodie bag to the parents, that way they can remove anything they like before the kids get their hands into it!

Whatever you choose to do remember, it may mainly be about celebrating your child turning 1 but it’s also about you surviving this first stressful year of parenting! Hence the reason there was champagne and beautiful cheeses at my son’s party! Hey, he won’t know any different will he?!


So what are your favourite kids birthday party themes? I think I may need to stock up on ideas… you know, just in case! Don’t forget to share the love and like, comment and share below.


Fav Photo Friday #2

Well I hope you enjoyed last week’s Fav Photo Friday, if you missed it you can catch it again here. I have to say though I do love photography, it’s something I’ve always been interested in but have never taken any further. It’s one of those things isn’t it? Oh, I’d love to take a course in photography. Oh, I’d love to brush up my high school Japanese.

Yeah, yeah. One day.

Well a few years ago I finally said what the hell! Sort of.
I didn’t actually go take a photography course.. haha, that’s sadly still on my to do list. What I did do though was a boat load of googling. I watched a lot of youtube tutorials, I read a lot of blogs and I practiced. I practiced, practiced, practiced. And I may not be amazing, but I think I can take an OK picture now! More importantly I have a lot of fun with it, particularly when taking pics of my baby boy. Who, as of tomorrow, will no longer be a baby 😦

I know, I can’t really believe it either. I feel rather odd really. Like how exactly did I get here and where did this amazing, clever, spirited little person come from? And that is what this Fav Photo Friday is all about. The birth of our son in honour of his 1st Birthday tomorrow. So technically speaking I didn’t take the photos below, one was taken by a midwife in the operating theater and the other by a wonderful hospital photographer. I still wanted to share them with you though (so please be warned there is a birth photo below that not everyone may be comfortable viewing) as I think they’re amazing.

I will admit it actually took me a while before I could look at the photo below. I have a whole series of them, taken by a wonderful midwife with my iPhone (so excuse the quality) during my emergency cesarean. It’s not that I didn’t want to see the birth of my son, I think it was more to do with the memories. If you’ve ever had a cesarean, planned or not, you’ll probably have an idea as to what I’m talking about. Without going into a ridiculous amount of gory details I’m talking about the odd sensation where you have no feeling below your chest and yet there are hands inside of you and they are pulling and tugging. So much so that you are literally moving around on the table. I even had those sensations a few weeks later still, especially whenever I thought about it.

Now don’t get me wrong. I don’t say this to put anyone off cesareans it was just my experience and I think sometimes the more we know going in the better prepared we are. In fact should I ever have another baby I’ll, most likely, be electing to go straight to a cesarean, god forbid the next one gets stuck too! The big thing now though is that when I look back on these photos I am left sitting in awe and wonder and my heart fills up with so much love.

I think we can all agree though, it doesn’t matter how we give birth to them, it’s how we love them and bring them up in this world that really matters.

So here is this week’s Fav Photo Friday. Don’t worry, I promise no more baby spam after this! I’ll share more backyard country pics next week.

IMG_0297

Mister L is born. April 16th @ 4:16pm 2015

BI191-0771

I can’t quite believe he was ever this small….. and he wasn’t even a small baby weighing it at 9lb 3oz and two weeks early!

Well there you have it folks! Another Fav Photo Friday done and dusted and now I’m off to bake my boy’s 1st birthday cake! Wish me luck and be sure to tune in next week for his party deets.

As always be sure to like, comment and share below!
Oh and do you have an awesome pic you’d like to share? Jump across to the contact me page and let me know.

DIY 1st Birthday Board

As I’m sure you can imagine I was just a little bit excited when it came to planning Mister L’s 1st Birthday party. Ever since he was a babe in my belly I had all these fabulous ideas and of course in no way was Pinterest helpful here! The problem ended up being too many ideas so I really had to try and narrow what I wanted to do down, who was I going to invite and most importantly what the hell was I going to buy him?

The one thing that I knew I wanted to do from day dot though was make him a first birthday board. Naturally Pinterest was to blame here again! God I love that website! I think birthday boards can be such a cute little addition to a party or cake smash but more importantly be something special for me to have as he gets older. This was really what I was looking for, something that would be nice enough for me to maybe frame and put up in his play room in the new house. Something to remind me of what a little character he is and all his little quirks, as no doubt they’ll change like the seasons.

All you have to do is search for birthday boards and you’ll find a plethora of different styles and types out there and there really are some amazing ones, you can even hire someone to make one for you out of wood! But I had a very specific chalkboard look in mind so I set about trying my hand at one, naturally I thought why not share it all with you and give you some pointers on just how to go about making one for yourself… well OK maybe for your child… maybe.

So here is my tutorial on a DIY Birthday Board.

DSC_0007

First Birthday Milestone Board 

What you’ll need:
⇒A set of good quality metallic markers (I used Crayola ones in a set of 8. But definitely get a good brand as some of the cheaper brands won’t show any difference in colour once on paper.)
⇒Pencil & Eraser
⇒Ruler
⇒Black card or board (in whatever size you want. I went big!)

Now don’t be put off by this! You don’t need to be an incredible artist or even mildly crafty to make this look good! I mean look at mine, I’m not fantastic free hand but I still think this looks pretty cool. The greatest thing is if you really are rubbish and your handwriting looks like chicken scratch then you can cheat and use a computer (might take a while though) and print out everything and copy it across, I’ll get more into that below.

So here we go!

  1. Lay your board out somewhere flat with good lighting, you’ll need the lighting in particular so you can pick up where you’ve drawn the pencil outlines without needing to press too hard. Now I suggest grabbing a piece of paper and doing a quick sketch of what you had in mind. You can really personalize these boards with whatever info you like! I chose:
    – Weight, Height and Teeth
    – Favourite TV Shows
    – Favourite Foods
    – Favourite Books
    – Favourite Toys
    – Words he can speak
    – Things he loves to do
    But don’t think you’re limited or need to do these! Personalize it to the things you want to remember and that your child really loves. I have a friend who’s little boy speaks 3 languages so I’d pop that on there! Or why not list what things he can sign if you’re teaching him that? The options are limitless. So go ahead and whip up a quick outline of the shape you’d like and how you want to lay it out. Also try to keep in mind how much you want to write in each section as this will help you decide how much space you’ll need later.

    DSC_0004 (1)

    A rough sketch will help you decide what goes where and how to lay it all out.

  2. Now comes the tricky part, deciding what font you’d like your child’s name to be across the top. This section might take a few hit and misses so allow yourself some time to mess around with it. (Though really I would actually allow yourself a good month to whip this whole thing up, that way you’re not having to rush and end up ruining your layout. I say a month only because I did a little bit at a time and often only did it while Mister L was napping. )
    To do the name across the top I recommend using a computer with a printer. Select a font in a word document and choose a size that will comfortably fit the name across the top of your board. It will take a few times to figure out what size you’ll need and you’ll probably print a few before you get it right! I used the font ‘Elephant’ in size 250 in Microsoft Word. Once you have the sizing right go ahead and print this out, you may need to use 2 sheets of paper.

    DSC_0001 (2)

    Ensure your pencil is dull so you don’t push through the board

  3. Now trim your paper down so that it will sit the name exactly where you want it and tape the two pieces of paper together so you’ll have a cohesive name. Try not to bunch or fold any paper up underneath as it will make copying the name onto your board a touch more difficult. Now stick the name lightly to the board with tape and using a dull pencil trace over the letters of your name, pushing into the board. You want to push only hard enough to leave an easily seen indent in the board and not push all the way through.
  4. Now pop your paper off and using your choice of colours trace over your indents. This will give you a nice clean line and a really professional looking name. You can colour or highlight your name in any way you like! I chose to do an outline of silver and then a rim around the inside in blue, then lightly filled in each letter. This gave it a very chalkboardy feel. I really do recommend going over some pieces twice too, anything you want to stand out and look really metallic will need a second coat, I used a second coat on almost the whole board for a strong look.  DSC_0004
  5. You can then add a banner under the name with the birthday of choice. This I drew free hand, as I’m sure you can tell! But if you bring up an image of a banner you like on google you can easily follow it bit by bit.
  6. You can now divide your space up with your ruler and lightly draw in your lines. Like I said above, take the time to figure out roughly how much space you’ll need for each section as it will depend on how much info you want to have!

    DSC_0002 (5)

    Dividing up your space early on will ensure you have enough room for each section.

  7. Now for each section I used a series of different ‘fonts’ or styles of writing, alternating between cursive, print, block and some random others I’ve been free handing since primary school! I found it gave it a nice chalkboard effect and really broke it up.  If you really don’t think you can free hand the writing you could type out what you like on a computer, print and trace the whole thing. Like I said, time consuming, but an option if you don’t like your handwriting! Also make sure you leave yourself some room for a few little illustrations… if you want to get creative.
  8. So now that you’ve decided what fonts you’d like you can go ahead and start on each section. I always start with pencil and very lightly write what I want. This really is imperative as if you push too hard the pencil line won’t erase away well and will be seen even under the metallic pen and it’s easy to misjudge how big or small your writing needs to be to fit within your confined area. So a light touch is key! I also found it quite helpful to draw very very faint lines across each section so that my lettering would stay relatively straight (if I wanted it too!) and allowed me again to gauge how much room I would need.

    DSC_0012

    I outlined the ‘Giraffe’s Can’t Dance’ twice in pink then filled the inside with a lighter purple only once, it gave a great contrast I thought.

  9. Once you’re happy with your pencil outlines you can go ahead and colour and outline with your metallic markers. Chop and change your colour combos as you see fit and add any kind of little embellishments you like, I particularly like to line the outline twice and then fill the insides with a lighter contrasting colour!
  10. Now that you have your writing and milestones all completed you can add a few basic illustrations beside some sections. I try and pick the easier of the subjects just because I’m not a great drawer. In this case I drew some musical notes for Mister L’s love of singing, I drew a stack of books with his favourite books and of course I drew (a very rough) Hoot from Giggle & Hoot, which is one of Mister L’s favourite tv shows!
    Of course you need to now go back and erase any faint pencil lines you’ve got leftover, be careful not to erase too much over the metallic pens as it will take some of the metallic fleck with it.

    DSC_0006

    Pretty darn fabulous! I loved making it and I think everyone will love it at Mister L’s party! (note: I will add in his weight once I can get it! He’s making it very difficult lately!!)

And now you’re done! You can show off your wonderful milestone birthday board at your child’s party or in the background of your cake smash session! Why not even frame it, like I plan on doing, and use it as decoration in your child’s play room or bedroom afterwards.

I just love how bright and playful Mister L’s looks and I can’t wait to add it to his party layout. You’ll have to stay tuned for more details about his party this weekend too!

So there you have my tutorial on how to make a birthday board. What do you think? And do you plan on trying one yourself? Let me know in the comments below! And don’t forget to share!!

xx


Fav Photo Friday #1

So I know lately all I’ve done is post recipes, unfortunately that’s mainly to do with my lack of time management at the moment (funny considering my previous life as a store manager and my particular skill set). I have all these wonderful ideas and partially written blog posts to share with you but I just haven’t been able to finish them thanks really to my almost 1 year old boy. I really wish this stage of his development would either speed up or revert completely! Horrible thing to say but there you have it. He’s learning to walk you see and he is frustrated beyond words that he can’t yet so he often screams until I help him walk around the house….. all. day. long. Of course this is really doing my back in and naturally who the hell has time for that? But we do what we have to do to stay sane and keep on moving forward. I will regret saying I wish he could walk already, wont I?

Anyway. The other main reason for a lack of interesting non-recipe based posts is we have come to a bit of a stand still on the block and building our new home, so I can’t even write about anything happening over there! Still I thought to myself what is one area I would love to share with you about my life here in the country? Hmm well, that would be my LIFE IN THE COUNTRY! And what better way to do that than through pictures.

So here I am starting Fav Photo Friday, where every Friday I will share a photo or two that reflects my life here in country Western Australia. A chance to catch a glimpse into my fairly ordinary but sometimes beautiful life. Come along for the ride, you never know it might even inspire you to come check out my little slice of the country sometime!

Here is my first Fav Photo Friday! Happy Friday Folks! 

Now these beautiful pics were taken during a hot air balloon ride my wonderful husband took me on for my birthday late last year. I have to say even if you live in the area this is just one of those things you must try! It really is worth it. To see the countryside from that view is just breathtaking! If you’d like to do the same I highly recommend Windward Balloon Adventures.

Balloon Ride 147

Reflections


Balloon Ride 097

My Backyard. The Wheatbelt, Western Australia


If you’ve got some spectacular photos of where you live that you’d like me to share jump on over to the Contact Me page and drop me a line!

Now I’m off to finish a certain little boy’s 1st Birthday party prep! Wish me luck.


**All photos have been taken by myself unless otherwise stated and linked. No sharing without permission and link backs. **


The Hands Down Best White Gluten Free Cake…EVER!

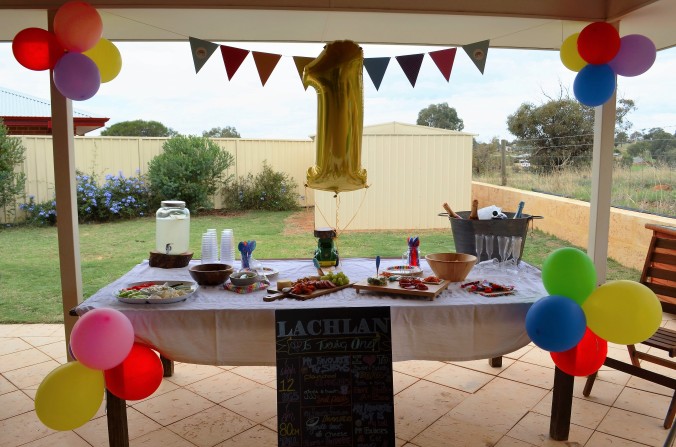
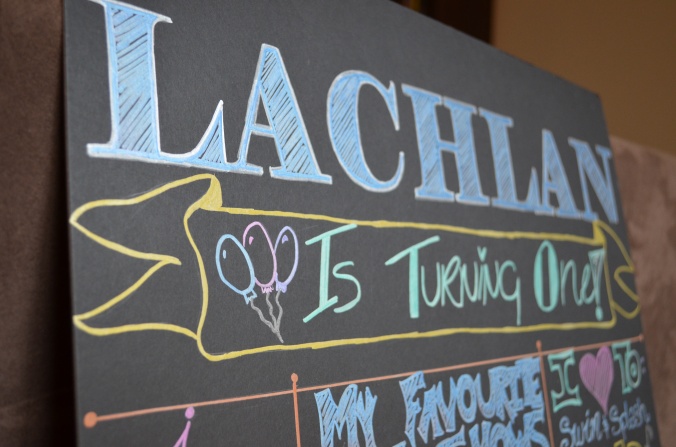
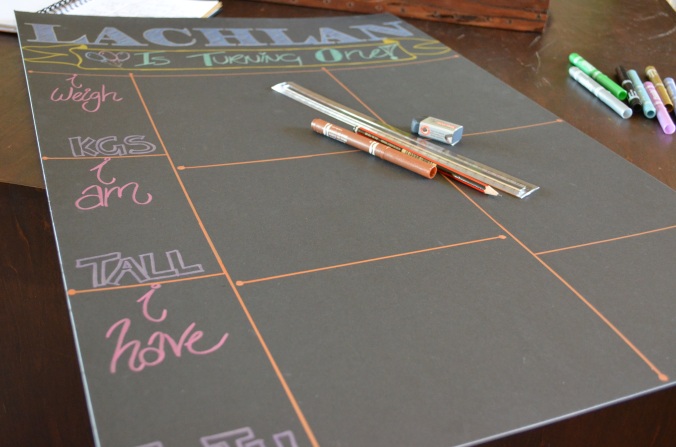
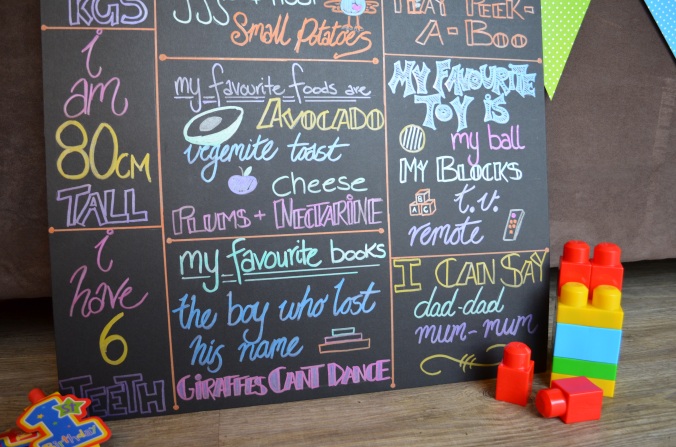
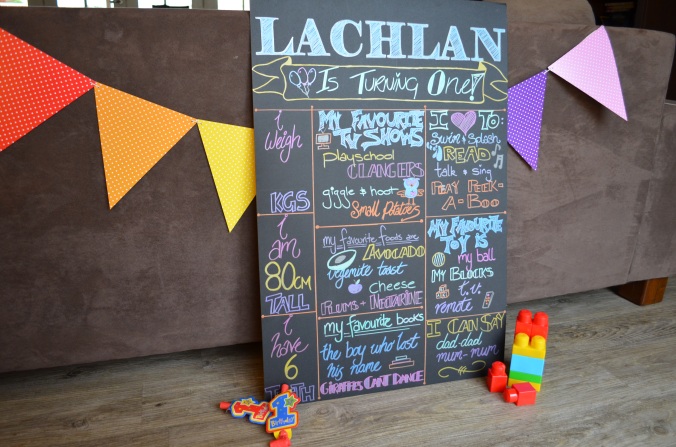
So my baby boy is nearly 12 months old now! I honest to god have no idea where the time went. I know all new Mums say that but really it freaking disappeared on me. Somehow here I am with a ‘not so little boy’ about to turn 1 in a few weeks and naturally I got a little bit excited to plan his First Birthday Party!

Actually I’ve been way too excited for quite a few months now and I’ve been tossing around ideas and making my mind up and changing it again every few days as to what I was going to be doing for it. The one thing I did know is which cake I would make him. As any good Aussie kid knows, all the great birthday cakes are made out of The Women’s Weekly Birthday Cake book. It was always a really big deal to choose your cake out of this book and have your Mum make it for you. So I’m sure you can imagine how I felt once Mister L was born. I couldn’t wait to do the same!

With the not-so-hard decision of which cake to make out of the way, it came down to what flavour of cake would I bake and would it be gluten free? So far my munchkin is luckily showing no signs of gluten intolerancy (unlike myself and my Mum) so I thought perhaps I should bake a gluten cake for him and our guests and just something small for Grandma and I to have. My husband though, said “Who cares? The baby won’t care what type of cake he’ll be eating so why not make it something Mummy can enjoy!”. After all, his first birthday isn’t just a celebration about him… it’s about us too, making it through this first year in (somewhat) one piece.

IMG_1958

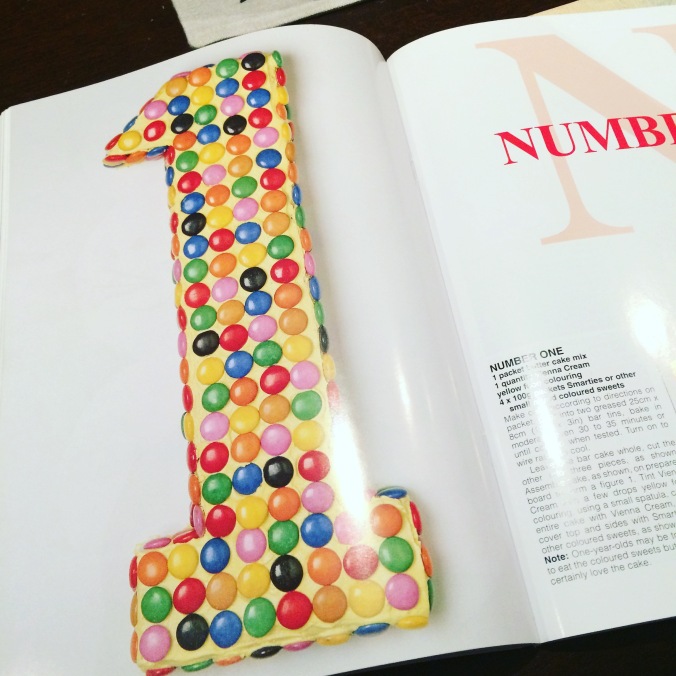
Mister L’s First Birthday cake was an easy choice!

So OK, decision made. I would make a gluten free birthday cake…. but sadly almost all the white and yellow gluten free cakes I’ve tried have turned out average…. or worse. Much, much worse actually. So a few months ago I went on the hunt to find the honest to goodness BEST Gluten Free cake and I have to let you in on this little secret. I FOUND IT!

The genius comes in the form of Yammie’s Glutenfreedom. A fabulous blog I found with an array of fabulous sounding recipes, including one awesome white cake. Naturally I had to try it out and naturally (like most decent gf cakes) it calls for you to make up your own All-Purpose flour blend. This, I admit, is something I’ve never really gotten around to doing. Oh I understand the benefits don’t get me wrong. But I just never really had the time or well, inclination to do so. However given my recent failures in the fluffy white cake department I thought if I’m going to do this, I need to do it right.

So I embarked on the adventure of mixing my own flour blend. I say adventure as I had to hit 5 stores before I could find all the ingredients and that included travelling to Perth to do so. The unfortunate side-effect of living in a small country town you see. But it didn’t take me too long to hunt down the elusive ingredients thanks to a wonderful little health food store in Midland Gate shopping center. With that out of the way I went about popping them together in just the right blend, again thanks to some helpful bits I picked up from Yammie and the lovely blog she directed me to. (You can find the flour blend I used here. But there are heaps of make your own flour blends on the web, just have a look!)

DSC_0076

Yup! It’s a flour mix, nothing special there…. or is there?

With my Gluten Free All-Purpose flour blend all mixed up I could finally start on my practice cake. Now to make my Number 1 cake I need 2 long loaf shaped cakes and this recipe will make three round ones. So this was really what I was practicing, to see how long and if the cake would work in a loaf pan, but I didn’t really want to have to eat two loaf cakes! So what was a girl to do?

Cupcakes. When in doubt, make cupcakes. (I’m thinking I need this printed on a t-shirt! Don’t you reckon?) The recipe should make 24 or so cupcakes, or in my case 1 loaf pan cake and 12 cupcakes! One loaf pan for us to trial and twelve cupcakes that I decided would have to be sent with my hubby to his work. Because god forbid twelve cupcakes are left in the house with me …. on my own!

So here I am with a recently repaired oven (got to love rentals don’t you?!) that still just doesn’t seem to be quite right, attempting a new recipe with a grizzly baby 4 weeks out from his birthday. Hell if this doesn’t work!

Well I can tell you now…. it didn’t. Not the cupcakes though, they were spectacular. Cooked beautifully and tasted AH-MAZING! (Even all the people at hubsters work thought they were the BEST cupcakes they had EVER tasted! Most said they couldn’t even tell they were gluten free!) The loaf pan though? Hmmm yeah. That just wasn’t cooking. I even thought it was cooked at one stage and pulled it out only to realise a few minutes later that it was still raw in parts, even after the skewer test! Sadly the problem my oven seems to have now is leaking hot air, making it hard to gauge the temperature and creating hot spots. Also the sheer fact that a loaf pan is drastically different in the size and density of cake it normally would create.

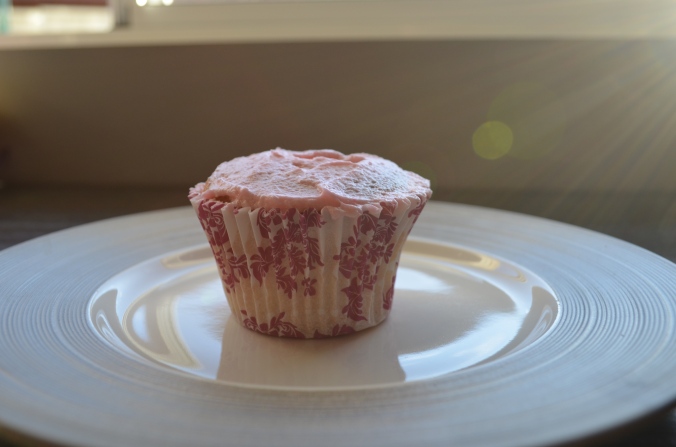
So after an additional 20 minutes at 150º Celsius (that’s on top of the 30 minutes at 180º the recipe called for) it eventually came out cooked. It was still quite a gamble pulling it out but what the hell! Let’s give it a whirl. Luckily this time it was cooked and even after all that messing about it was freaking delish! I let the cupcakes and the cake cool and then covered them in a lightly pink buttercream icing and WOLLAH! Beautiful, moist, light, fluffy cake covered in sugary icing goodness. It was then and there that I decided this would not only definitely be the cake I would use for Mister L’s birthday cake but probably also now my go-to white cake for literally every occasion. (A big claim I know!)

Now I suppose after all this hype and talk I should probably share with you this wonderful recipe! Well OK! Here it is.

DSC_0082


The Best White Gluten Free Cake…. EVER!

Ingredients:
2 + 3/4 Cups Gluten Free All Purpose Flour (I used this one here.)
1/4 Cup Coconut Flour
1 + 2/3 Cups Sugar
1 Tbsp Gluten Free Baking Powder
3/4 tsp Salt
170g Salted Butter, softened (yes you read right, salted!)
1/2 Cup Vegetable Oil
1 + 1/4 Cup Milk
2 tsp Vanilla Extract
8 Egg Whites

Method:
Let’s get this party started and get you tasting this beautiful cake right away!
Now the recipe says this will make 3 x 20cm (8 inch) round cakes or one 22 x 33cm (9 x 13 inch) cake. It will definitely make 24 cupcakes too! So pick your poison and grease and line your cake tins. I always prefer to use baking paper in mine, just to make removal easier.

Preheat your oven to 180º Celsius and pull out your stand mixer. In a large bowl pop your flours, sugar, baking powder and salt and give them a slow spin with the mixer just to incorporate them.

Now pop in your softened butter (a few seconds in the microwave will help if you haven’t thought ahead and pulled it out earlier), throw in your vegetable oil and beat well until thoroughly combined. Now go ahead and add your egg whites one at a time, beat well after each one to ensure thoroughly mixed through. (Remember, not using the yolks is what makes this a white cake and not a yellow cake!) I really recommend taking your time and making sure you add the eggs slowly and beating well, it honestly does make a difference. No point rushing huh!

DSC_0071

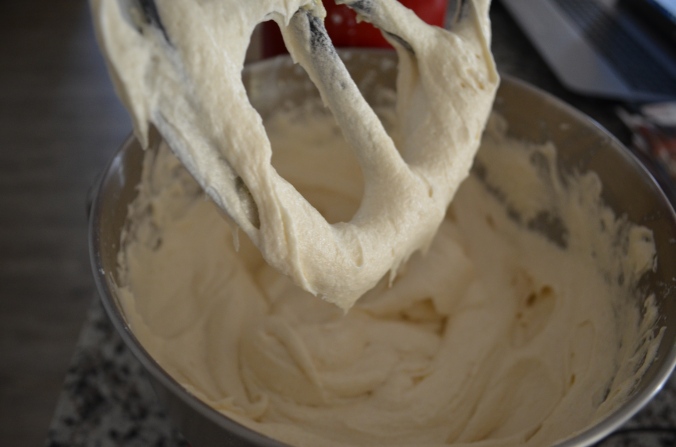
A thick white batter is what you’re looking for here once everything has been beaten together well.

Go ahead and add your vanilla extract and then add your milk a 1/4 cup at a time again mixing till just incorporated after each addition. Once all of your milk is worked in turn your mixer up to high speed and beat for 2 minutes. Your batter should be thick, sticky and quite fluffy! Now you can spread your mixture evenly into your prepared tin/s or spoon into lined muffin tins. If making muffins, really top the mixture right up to the top of the liner.

Bake in your oven for 20 minutes if making the three round or the cupcakes. If you are making the large rectangle cake I suggest cooking for a touch longer, maybe 30-35 minutes and maybe knock your oven down a few degrees too (this is a tip from someone else, I have yet to try it, though I will be shortly). A skewer inserted into the middle can be used as a guide, however I found it to be unreliable in this case.

You’ll know they’re done when the cake is a golden brown on top and slightly firm to the touch. If it doesn’t bounce back bake it longer!!

DSC_0077

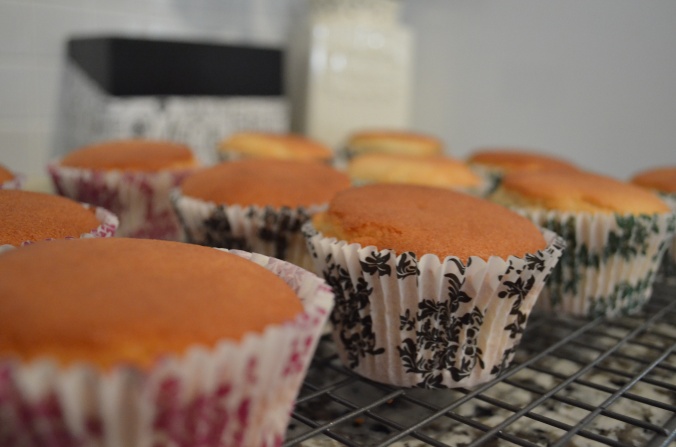
A deep golden brown on top and perfectly cooked on the inside! These cupcakes were D.E.L.I.C.I.O.U.S!

Once cooked pop your tins onto a cooling rack for 15 minutes or so, your cakes should be relatively cool to touch before attempting to remove them from your pans. Once fully cooled go head and ice in your choice of icing. I love to use a rich buttercream on these as it just makes it that bit more like a kids birthday cake, hehe! Who doesn’t love a good sugar overload every once in a while?

So that’s it! What I consider to be THE BEST white gluten free cake I have ever tasted and I would definitely venture to say, the Best cake I may have ever baked! I am really looking forward to whipping up Mister L’s birthday cake… as long as the stress of it doesn’t kill me first. Be sure to check back in a couple of weeks for my run down on his birthday cake and party, though if you don’t hear from me? I may be dead. But hey as long as the cake tastes great huh! haha

IMG_2123

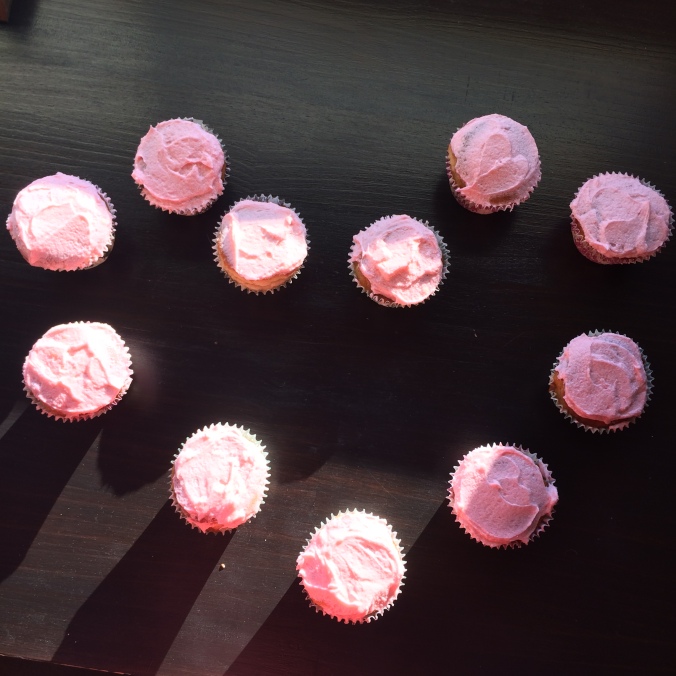
Who doesn’t love a perfectly pink buttercream icing to top things off? Now get these cupcakes out of here before I eat them ALL!!!

So who’s going to give this fabulous recipe a try? And have you made your own flour blend before? As usual let me know by clicking on ‘leave a comment’ at the top!